Live Stream Guide: How to Go Live Without Looking Completely Lost
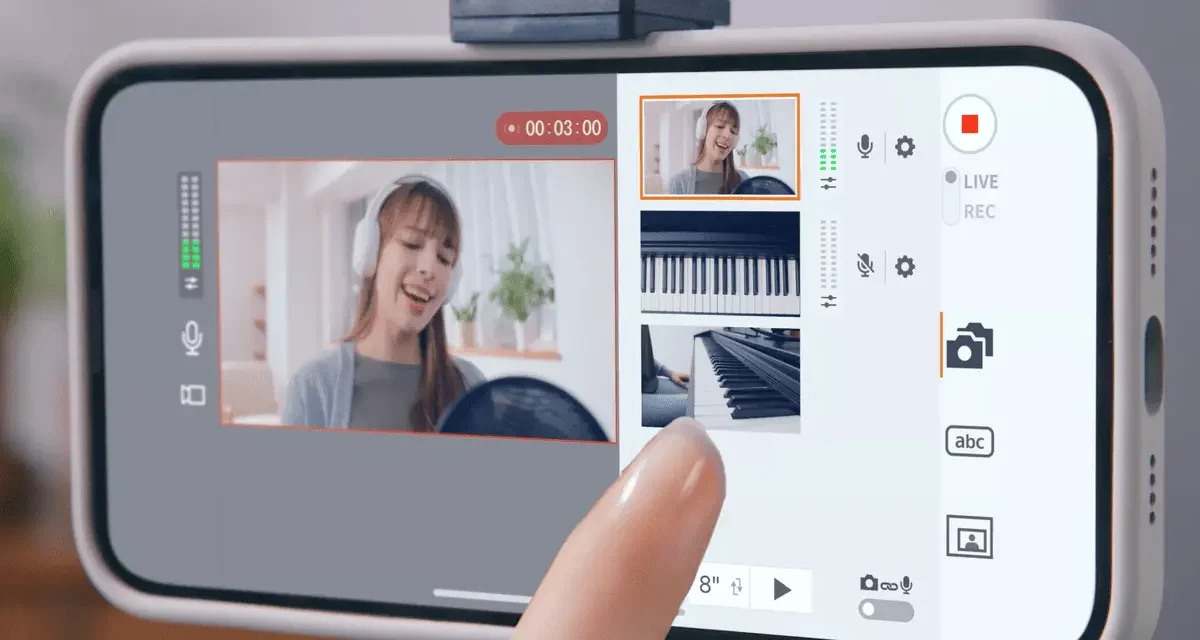
This live stream guide explains how to plan, set up, test, and deliver an engaging broadcast without immediately buying an expensive studio full of equipment.
Live broadcasting often looks simple from the outside.
You open an app, point a camera at yourself, and press Go Live.
Then the microphone sounds distant. The video freezes. The background music becomes louder than your voice. Nobody answers your first question, and an unexpected message appears in the chat before you have even finished introducing yourself.
Welcome to broadcasting in real time.
Unlike edited video, a live broadcast gives you no convenient opportunity to remove an awkward pause, repeat a sentence, or pretend a technical problem never happened.
That unpredictability is also what makes the format exciting.
A live broadcast can transform an ordinary gaming session, interview, tutorial, music performance, webinar, product demonstration, or community conversation into a shared experience where viewers participate while events unfold.
You do not need perfect equipment to begin.
You need:
- A clear concept
- Understandable audio
- Stable internet
- A suitable platform
- A simple production plan
- Basic moderation
- Permission to use the content you broadcast
- A backup plan for technical problems
At STREAM PSDDESAIN, we publish practical information about creator platforms, streaming software, broadcast technology, audience engagement, monetization, stream quality, and safer live production.
Use this live stream guide as a starting point for creating broadcasts that viewers can understand, enjoy, and trust.
What Makes a Broadcast Truly Live?
Live streaming delivers video and audio to an audience while the content is being produced.
Viewers do not simply watch the final result.
Depending on the platform, they may:
- Write messages in chat
- Ask questions
- Vote in polls
- React to events
- Join as guests
- Influence what happens next
- Support a creator through platform features
This creates an experience that recorded video cannot reproduce in exactly the same way.
The audience becomes part of the content.
A strong broadcast should therefore offer something that viewers would not receive from watching a replay later.
That might include:
- Immediate answers
- Shared reactions
- Community decisions
- Live demonstrations
- Unplanned moments
- Direct interaction with the host
Why Viewers Stay
Being live does not automatically make content interesting.
A creator sitting silently and checking a phone is still a creator sitting silently and checking a phone.
Viewers usually stay when they understand:
- What is happening
- Why it matters
- What may happen next
- How they can participate
- What they will learn or experience
Live content creates urgency because the outcome has not yet been decided.
A viewer may remain because their question could be answered, the host may acknowledge them, or the audience may influence the next part of the broadcast.
The key is to make participation feel meaningful rather than decorative.
Live Stream Guide to Choosing a Format
Choose the format before choosing cameras, lights, overlays, or microphones.
Ask:
What should viewers experience during this broadcast?
Your answer determines the platform, equipment, stream length, layout, and interaction style.
Gaming Broadcasts
Common formats include:
- Gameplay
- Tutorials
- Speedruns
- Challenges
- Reviews
- Community matches
- Live commentary
Gaming creators may need gameplay capture, broadcasting software, and a clear microphone.
A visible camera can add personality, but it is not required when the commentary and content remain engaging.
Conversation and Interview Shows
Examples include:
- Interviews
- Q&A sessions
- Podcasts
- Industry discussions
- Advice sessions
- Community conversations
Clear audio matters more than an elaborate visual layout.
Prepare questions, transitions, and a backup topic in case the conversation slows down.
Educational Broadcasts
Possible formats include:
- Software tutorials
- Language lessons
- Study sessions
- Professional workshops
- Demonstrations
- Career discussions
Educational broadcasts work best when viewers know what they will learn by the end.
Use a simple structure:
- Explain the problem.
- Demonstrate the process.
- Show the result.
- Answer questions.
- Summarize the lesson.
Entertainment and Creative Shows
Examples include:
- Original music
- Comedy
- Art creation
- Audience-controlled challenges
- Talent performances
- Creative demonstrations
Creators must confirm that they have permission to broadcast every song, video, photograph, performance, or other protected element used during the show.
Professional and Event Broadcasts
This category may include:
- Webinars
- Product launches
- Conferences
- Company announcements
- Training
- Panel discussions
- Virtual events
Professional production often requires stronger preparation, guest coordination, moderation, branding, and backup systems.
Choosing a Platform
There is no single platform that works best for every creator.
Compare platforms based on:
- Content type
- Existing audience
- Discovery opportunities
- Interaction tools
- Typical stream length
- Monetization availability
- Regional restrictions
- Archive and replay options
- Technical requirements
- Community culture
YouTube Live
YouTube supports broadcasting through mobile devices, webcams, encoders, and compatible consoles.
Its official live streaming support page explains current account requirements, setup methods, channel verification, and restrictions.
YouTube may suit:
- Tutorials
- Educational sessions
- Gaming
- Interviews
- Long discussions
- Conferences
- Creators who also publish recorded videos
A major advantage is that broadcasts can remain available as replay content, depending on channel settings and platform policies.
Always verify current eligibility requirements before planning a public event.
Twitch
Twitch is strongly associated with gaming and community-driven broadcasts.
It also supports categories involving:
- Conversation
- Music
- Creative work
- Events
- Other permitted formats
Twitch can work well for creators who want:
- Frequent broadcasting
- Strong chat participation
- Recurring schedules
- Gaming communities
- Long-form audience interaction
Review the official Twitch Getting Started resources before configuring a new channel.
TikTok LIVE
TikTok LIVE focuses heavily on mobile-first, rapid interaction.
It may suit:
- Conversational sessions
- Mobile demonstrations
- Community discussions
- Shorter broadcast formats
- Creators with an existing short-form audience
The official TikTok LIVE support page explains current features, account eligibility, and safety tools.
Features and regional availability can change, so confirm the latest rules directly through TikTok.
Begin With One Main Platform
Trying to broadcast everywhere immediately can create unnecessary complexity.
You may need to manage:
- Several chats
- Different screen formats
- Separate moderators
- Conflicting platform rules
- Extra computer load
- Multiple audience instructions
Start with one primary platform.
Learn its tools, policies, and audience behaviour before expanding.
Live Stream Guide to a Basic Setup
A beginner setup can be surprisingly simple.
You may begin with:
- Smartphone or computer
- Built-in or external camera
- Microphone
- Internet connection
- Light source
- Quiet space
- Platform account
The most expensive component is not always the most important.
For many broadcasts, audio quality matters more than camera quality.
Make Your Voice Easy to Understand
Viewers may accept an average image.
They are less likely to tolerate:
- Loud buzzing
- Constant echo
- Distorted speech
- Background conversations
- Music covering the host’s voice
- Sudden volume changes
- A microphone that sounds far away
Improve audio by:
- Moving closer to the microphone
- Closing windows and doors
- Turning off unnecessary fans
- Reducing room echo
- Using headphones
- Keeping the microphone away from a keyboard
- Testing your normal speaking volume
- Recording a short sample first
Curtains, rugs, beds, sofas, and other soft materials can help reduce echo.
You do not need an expensive acoustic treatment before your first broadcast.
Make an Average Camera Look Better
Lighting can improve video more than buying a new camera.
During daytime, face a window.
At night, place a lamp or light in front of you or slightly to one side.
Avoid placing the brightest light directly behind your body unless you intentionally want to appear as a silhouette.
Check:
- Face brightness
- Harsh shadows
- Reflections in glasses
- Background distractions
- Camera height
- Framing
- Focus
Place the camera close to eye level when possible.
Test Your Connection
Broadcasting depends heavily on upload performance.
Download speed affects how quickly you receive information.
Upload speed affects how reliably your video leaves your device and reaches the platform.
Before going live:
- Test your internet connection
- Use a wired connection where practical
- Move closer to the router when using Wi-Fi
- Pause large downloads
- Stop unnecessary cloud backups
- Close unused applications
- Keep mobile data as a backup
A stable lower-resolution stream is usually better than a high-resolution stream that constantly freezes.
Do not select the highest quality setting simply because the option exists.
Using OBS Studio
OBS Studio allows creators to combine:
- Cameras
- Microphones
- Gameplay
- Screen captures
- Images
- Text
- Browser sources
- Other visual elements
The official OBS Quick Start Guide recommends beginning with the Auto-Configuration Wizard.
The wizard evaluates the computer and network before suggesting initial broadcast settings.
Scenes and Sources
A scene is a complete screen layout.
Examples include:
- Starting Soon
- Main Camera
- Gameplay
- Interview
- Break Screen
- Ending Screen
A source is an element placed inside the scene.
Sources may include:
- Webcam
- Microphone
- Game capture
- Display capture
- Image
- Text
- Browser content
Think of a scene as a room and sources as objects inside that room.
Four Scenes Are Enough to Begin
You do not need dozens of animations and transitions.
Start with four scenes.
Starting Soon
Use this before appearing on camera.
Include:
- Broadcast title
- Brief countdown
- Simple background
- Music you have permission to use
Main Scene
Include:
- Camera or main content
- Clean layout
- Minimal text
- Chat only when it adds value
Be Right Back
Use this during a short break.
A clear break screen is better than leaving an empty chair visible for several minutes.
Ending Screen
Use this to:
- Thank viewers
- Mention the next broadcast
- Direct viewers to replays or other content
- End the session deliberately
The Five-Minute Pre-Show Check
Complete this routine before every broadcast.
Minute 1: Camera
Check:
- Framing
- Focus
- Lighting
- Background
- Orientation
Minute 2: Audio
Check:
- Microphone level
- Background noise
- Echo
- Music balance
- Headphone feedback
Minute 3: Internet
Check:
- Connection stability
- Background uploads
- Backup connection
- Unnecessary devices
Minute 4: Platform
Check:
- Title
- Category
- Description
- Privacy setting
- Thumbnail
- Chat controls
Minute 5: Content
Check:
- Opening sentence
- Main segments
- Audience questions
- Required links
- Closing plan
This simple routine prevents many avoidable mistakes.
Live Stream Guide to Planning the Show
A run of show is a basic timeline explaining what happens during the broadcast.
It prevents the host from staring at the camera and asking:
So… what should we talk about now?
A 45-minute session could follow this structure.
0–3 Minutes: Opening
- Welcome viewers
- Introduce the topic
- Explain what will happen
- Invite participation
3–10 Minutes: Warm-Up
- Ask an easy question
- Introduce the host or guest
- Establish the context
10–30 Minutes: Main Segment
- Gameplay
- Demonstration
- Tutorial
- Interview
- Discussion
30–40 Minutes: Audience Participation
- Questions
- Poll
- Viewer reactions
- Examples from chat
40–45 Minutes: Closing
- Summarize the session
- Answer one final question
- Mention the next broadcast
- Thank viewers
- End clearly
The plan should support the host without making the show feel robotic.
What to Say When Nobody Is Watching
Beginners often see zero viewers and stop talking.
Then someone enters, hears silence, and leaves.
Continue presenting as though a replay audience already exists.
Avoid:
Nobody is here, so I will wait.
Try:
Today we are testing three inexpensive ways to improve microphone quality. I’ll begin with the simplest adjustment and compare the results.
New viewers can enter at any time.
Give them useful content to enter.
Make Participation Easy
Avoid asking questions that are too broad.
Weak:
Does anyone have anything to say?
Better:
- Which option would you choose?
- What problem do you experience most often?
- Should we test version A or version B?
- Where are you watching from?
- Rate this setup from one to ten.
- What should we test next?
Questions work better when viewers can answer quickly.
Some viewers prefer to watch without commenting.
Do not pressure silent viewers to participate.
Live Stream Guide to Moderation
Public chat can attract:
- Spam
- Harassment
- Repeated messages
- Offensive comments
- Fake links
- Impersonation
- Deliberate disruption
Moderation protects the creator and audience.
TikTok’s official LIVE moderation guidance explains tools for filtering, muting, limiting, reporting, and blocking unwanted activity.
YouTube, Twitch, and other platforms provide their own moderation systems.
Before broadcasting:
- Review chat controls
- Add blocked terms where appropriate
- Appoint a trusted moderator for larger sessions
- Define unacceptable behaviour
- Remove suspicious links
- Avoid extended arguments with disruptive users
- Protect private information
Do not appoint a moderator simply because someone asks for power in chat.
Choose someone trustworthy who understands the community rules.
Protect Your Privacy
A camera or screen share can reveal more than expected.
Check the room and computer for:
- Home address
- School or workplace information
- Identification documents
- Banking details
- Private messages
- Email notifications
- Family photographs
- Calendar appointments
- Location clues
- Confidential file names
Use application capture instead of full-screen capture where possible.
Turn off notifications before sharing a screen.
Never display:
- Passwords
- Login codes
- Banking information
- Customer data
- Private identification numbers
- Confidential workplace materials
A single accidental screen share can create a larger problem than a technical failure.
Copyright and Content Permissions
Broadcasting live does not remove copyright responsibilities.
Music, films, television footage, sports broadcasts, photographs, games, and other media may be legally protected.
YouTube’s official copyright guidance for live broadcasts states that active streams may be checked for third-party content.
A detected match may result in:
- A warning
- Temporary interruption
- Restrictions
- Termination of the broadcast
Use:
- Original content
- Material you have permission to broadcast
- Properly licensed music
- Platform-provided libraries
- Content clearly allowed by its licence
Giving credit does not automatically provide permission.
Do not rebroadcast paid sporting events, television channels, films, concerts, or another creator’s broadcast merely because you can access them.
Using Background Music
Before including a music track, confirm:
- Who owns it
- Whether live broadcasting is permitted
- Whether commercial use is permitted
- Whether archived replays are covered
- Whether attribution is required
- Whether the platform may still detect it automatically
Keep records of licences and permissions.
When the rights are unclear, do not use the track.
Common Technical Problems
The Broadcast Keeps Buffering
Try:
- Lowering the output resolution
- Reducing the bitrate
- Using wired internet
- Closing background uploads
- Restarting the router
- Testing during a quieter period
The Microphone Is Too Quiet
Try:
- Moving closer
- Selecting the correct microphone
- Increasing input gain carefully
- Checking application permissions
- Reducing other audio sources
The Voice Sounds Distorted
The input level may be too high.
Reduce microphone gain until ordinary speech remains below the maximum level.
The Camera Freezes
Try:
- Disconnecting and reconnecting it
- Closing other programs using it
- Changing the USB port
- Restarting the broadcasting software
- Lowering camera resolution
Viewers Hear an Echo
Possible causes include:
- Speakers feeding into the microphone
- The stream playing on another device
- Duplicate audio sources
- Guest audio returning through several channels
Use headphones and inspect all active audio sources.
The Computer Becomes Slow
Try:
- Closing unnecessary programs
- Lowering video resolution
- Removing complicated effects
- Simplifying scenes
- Using hardware encoding when supported
- Checking OBS system requirements
A simple production that works is more professional than an impressive layout that crashes.
Build an Emergency Scene
Create a holding screen that says something simple, such as:
We’re fixing a quick technical issue. Please stay with us.
Use this process:
- Switch to the holding screen.
- Mute broken audio.
- Check the internet connection.
- Restart the affected source.
- Explain briefly what happened.
- Restart the stream only when necessary.
Technical problems feel less chaotic when the host communicates calmly.
Do Not Buy Everything Immediately
Beginners may believe they need:
- Premium camera
- Expensive microphone
- Multiple monitors
- Stream deck
- Capture card
- Professional lights
- Custom overlays
- Green screen
- Studio furniture
Some creators eventually use these tools.
First learn:
- How to speak clearly
- How to structure a show
- How to engage viewers
- How to moderate chat
- How to solve basic problems
- What your audience enjoys
Upgrade only when a real limitation becomes clear.
Do not spend money solving a problem you have not experienced.
The First Five Broadcast Challenge
Do not judge your ability after one session.
Use your first five broadcasts as experiments.
Session 1: Technical Stability
Focus on:
- Audio
- Video
- Internet
- Platform controls
Session 2: Structure
Use a clear opening, middle, and ending.
Session 3: Interaction
Prepare at least five audience prompts.
Session 4: Format
Test a different segment or content structure.
Session 5: Improvement
Review previous sessions and fix the most obvious weakness.
After five broadcasts, evaluate:
- Average viewing duration
- Chat participation
- Technical stability
- Strongest segments
- Moments where energy dropped
- Questions viewers asked
- Sections worth turning into clips
Do not focus only on peak viewer count.
A small audience that remains engaged may be more valuable than a larger audience that leaves immediately.
Turn One Broadcast Into More Content
After the session, you may create:
- Short clips
- Key moments
- Tutorial segments
- Quotes
- Written summaries
- Highlight videos
- Social posts
- Follow-up topics
- Frequently asked questions
A one-hour interview might become:
- One full replay
- Four short clips
- One article
- Three quote posts
- One follow-up Q&A
This makes broadcasting part of a wider content strategy instead of an isolated event.
How Creators May Eventually Earn Revenue
Possible revenue sources include:
- Platform monetization
- Subscriptions
- Memberships
- Viewer support
- Sponsorships
- Advertising
- Affiliate links
- Product sales
- Paid virtual events
- Professional services
Availability depends on:
- Platform
- Country
- Account status
- Audience
- Program requirements
- Content compliance
Going live does not create automatic income.
Creators should first build:
- Consistency
- Trust
- Useful or entertaining content
- Community
- Clear positioning
- Reliable production
Revenue becomes more realistic when viewers understand why they should return.
Seven-Day Launch Plan
Day 1: Choose the Concept
Complete this sentence:
My show helps or entertains [audience] by [main value].
Example:
My show helps beginner gamers improve through relaxed tutorials and viewer challenges.
Day 2: Choose the Platform
Review official eligibility, content rules, and broadcast methods.
Day 3: Prepare the Setup
Test:
- Camera
- Microphone
- Lighting
- Internet
- Background
Day 4: Configure the Broadcast
Prepare:
- Scenes
- Sources
- Audio
- Title
- Description
- Chat controls
Day 5: Run a Private Test
Record locally or use a private or unlisted option when available.
Review:
- Volume
- Lighting
- Framing
- Screen capture
- Computer performance
Day 6: Plan the Show
Prepare:
- Opening
- Main segments
- Audience questions
- Closing
Day 7: Go Live
Start with a manageable session.
Thirty focused minutes can be more effective than two unplanned hours.
Final Thoughts
A successful broadcast involves more than pressing one button.
It combines:
- Preparation
- Communication
- Technical stability
- Audience interaction
- Moderation
- Copyright awareness
- Privacy protection
- Consistency
Your first session may feel awkward.
That is normal.
You may speak too quickly, forget a transition, misread the chat, or discover that the microphone captures every keyboard click.
The goal is not to appear perfect.
The goal is to create a broadcast that viewers can understand, enjoy, and trust.
Start with the equipment you already own.
Make the audio clear.
Give the broadcast a purpose.
Ask specific questions.
Protect your privacy.
Use only content you are allowed to broadcast.
Then review the result and improve one thing before the next session.
This live stream guide is only the beginning. Learn more about the site’s editorial approach and the topics we cover on the STREAM PSDDESAIN About Us page.
Frequently Asked Questions
What equipment does a beginner need?
A basic setup may require only a phone or computer, camera, microphone, stable internet, lighting, and a streaming-platform account.
Is OBS Studio required?
No. Some platforms support direct mobile or webcam broadcasting. OBS is useful when you need multiple scenes, gameplay capture, overlays, external devices, or greater production control.
Which platform is easiest for beginners?
The best option depends on your content, audience, and existing community. YouTube, Twitch, and TikTok support different formats and audience behaviours.
Is a camera always necessary?
No. Gaming, educational, audio, and screen-based broadcasts can work without a visible host when the content remains clear and engaging.
How fast should the internet connection be?
Requirements vary according to resolution, frame rate, bitrate, platform, and stability. Check the official platform recommendations and test upload performance before broadcasting.
Why does a stream keep buffering?
Common causes include weak upload performance, unstable Wi-Fi, excessive bitrate, background uploads, and computer-performance limitations.
Is microphone quality more important than video quality?
For many formats, clear and stable audio is more important than having an expensive camera.
Can popular music be played during a broadcast?
Only when the creator has the necessary rights or the music is provided under terms allowing the intended use. Giving credit does not automatically provide permission.
Is a moderator necessary?
Moderators become increasingly useful as the audience grows. Even small creators should understand the platform’s chat and safety controls.
How long should a first broadcast be?
There is no universal length. A focused session lasting approximately 20 to 45 minutes is often easier to manage than an unplanned multi-hour broadcast.
What should a host say when nobody is watching?
Continue presenting the planned content as though replay viewers are present. New viewers can enter at any moment.
How do creators build an audience?
Growth may come from consistency, clear positioning, audience interaction, useful content, short clips, collaboration, and gradual improvement.
Can one broadcast be reused?
Yes. Depending on platform settings and content rights, it may become a replay, short clips, written content, highlights, or social posts.


Leave a Reply